Italian/Spanish Books

I’m on a kick to get a posting of my cooking books into some semblance of order.  We have gone from English to fuax Middle Eastern.  I had planned to do all the Middle Eastern books that are the core for my redactions however today’s post will be a bit short as I have a few books that I think are worth mentioning first.

Le Viandier de Taillevent. This book is based on the Vatican Library Manuscript .  The recipes are translated from the originals (a good thing if you don’t read old Italian).  There are no offered measurements so lots of redaction is necessary.  An excellent resource!

Recipes from Banquet dels Quartre Barres.  (I have the 2nd edition copy).   This booklet, per the forward, is based from the Valencia manuscript, and the Barcelona manuscript.    This are a 15th century cookbooks.  The recipes are written with the original old Spanish and an English translation.  The author has done a bit of redaction himself and gives suggested measurements.  This book is definitly worth owning!

Painter & Food Renaissance Recipes (Italian)- Does not have any original recipes, what it does have are little tidbits of how period cooking occurred and some fairly interesting period paintings.   Good for a general look.

Not Primary Middle Eastern/Persian Cookbooks

So I have a handful of books that aren’t good for primary sources of documentation.  This does not mean they aren’t with out merit.  While the books do not cite the original recipe, each one has either really great historic pieces of information, GORGEOUS pictures, or a really great idea to point in the right direction a period recipe may be hidden at.

Arabic Recipes & History for Medieval Feasts (Middle Eastern)- Good ideas but no original recipes.  I would use this as a secondary source at best.  Great references though for original recipes and historic facts.

A Taste of Persia (Persian) – I like this book just for the modern recipes.  There are no original period recipes and the history is more of a 1st cooking view, however the recipes are wonderful. I like the description of the rice dishes.  One of my favorite!

The Legendary Cuisine of Persia (Persian) – This book has no original period recipes…what it does have are great modern recipes that point the way on how things might have been cooked and a break down of a period Persian kitchen.  Good for historical kitchen and cooking points, not so much as a primary reference.

The Emperor’s Table (Indian/Persian) – I adore this book.  The period art piece pictures are worth the price alone.  The recipes are close to period; however there are no original recipes listed so again a good secondary cook book but not good for a primary reference.  If you are looking for period pictures on women wearing choli tops with bare midrifs, this is your book!  The cook portions are exacting for how to prepare dishes that do show up in period manuals even though these recipes do not quote original historic documentations.  Thumbs on this one!

A Drizzle of Honey – The lives and Recipes of Spain’s Secret Jews (Spanish/Moorish)- This book has really good historical references not only to the cities, political events, but the size and reason for how things were used and cooked, i.e. the size of a pat of butter was the size of a coin suggested in X recipe.  This book does not have original period recipes yet it contains some very excellent historic information for Spanish and Moorish cooking adapted by the Jewish people.

From Persia to Napa. I like this book, but not for the recipes at the end.  This book as excellent Persian painting photos, great for costumers.  This book has great period Persian poetry and history of wine.  This book is great for costumers and those interested in Persian history of wine and cooking with wine.  However if this is not a period book by any imagination for cooking.

Springerele

I had been looking to do this type of cookie for awhile…not because of the actual cookie but the cookie molds are fantastic!  Ok…I know, that’s a little odd but hey, every one has to have a reason why they cook, yes?

Springerle Cookies

This recipe is from Godecookery on line:

The Springerle cookie originated in Swabia & Switzerland by the 14th century; we use our own, original recipe, based directly on the Baseler Springerle receipt, one of the oldest Springerle recipes known to exist today:

Take 1 pound flour and pass it through a fine sieve and place it overnight in the oven hole (to keep it warm). Take a pound of dry sugar and 4 eggs, but big ones, 2 spoons cleaned anise (if you want good ones then roast the anise first). Then 2 tablespoons aged Baseler cherry schnapps (helps to get rid of the egg taste and helps the dough rise). Let the oldest boy mix the sugar eggs and anise. Then the second oldest, then the third, altogether at least 1/2 hour. Then add the schnapps, mix the flour, and knead the dough until it stays together. Roll the dough out, but not too thin, and carefully press, but with enough pressure the mold into it. Afterwards store on flour dusted board for 24 hours, in a warm place. Then bake with low heat. To get them nice and white, before baking, dust some flour on them and then blow it away. If you don’t get feet (a bottom layer) in your springerle, then the boys or the house girl will scold you: “It was badly stirred, or there was a draught in the room.” Springerle without feet are a nuisance.

Source: http://www.springerle.com/springerleE/REZEPT/rez03.html <Feb. 7, 2004>

http://www.godecookery.com/cookies/ingred.html

Ingredients:

4 C. Flour        2 C. Sugar        2 tsp ground anise         2 TBS schnapps

4 Eggs

Redaction:

Gathering all 5 of the ingredients together was fairly easy.

I did have to change the cherry schnapps for peach.  (The peach was on hand)

I combined the flour and sugar first,and then added in the ground anise, mixing well.

Next I made a well in the center of the dry ingredients and added the eggs and the schnapps.

Now the original recipe calls for cherry schnapps as it hides the egg flavor and helps the rising process.  I had peach schnapps on hand so used that.  I justify the change as the flavor does not matter so much as long as it goes with the anise and covers up the extreme eggyness of the batter.

When mixing the dough together, I found that the dough crumbles a lot for the first few minutes.

Keeping kneading.  The dough does eventually incorporate everything though there will be a moment or 4 when there will be a temptation to add in another egg or a touch of milk.  Do not do this!  Keep on kneading.  Everything will blend well turning into this rich, slightly sticky yummy dough.

When the dough ball stage has been reached, turn out on to a well floured surface and roll to about ¼ (or slightly thicker).  You want a good thickness as you have to really press the molds down to get a good definition.  If the dough is to thin the dough will not be pressed into the mold.

Sprinkle the surface with flour and make sure that under the dough is well floured too.  At this point you can either flour your cookie molds or lightly grease them.  I lightly floured the dough and lightly greased my molds as there will be some serious presage onto the dough going on.

Press the mold into the dough, so that the carvings will show through.  Do not be scared to LEAN into it.

Peal the mold off carefully then using a sharp knife cut out the pressed dough from the main batch of dough.

Place either on a parchment lined cookie sheet or a floured surface to dry.

Once all the cookies have been pressed, cut and set onto a surface, allow to dry for 12-24 hours depending on the humidity then bake the cookies at 325 until dry but not golden.  Keep a close eye on the cookies.  Do not over cook!

A close up from the batch.

Here is a larger over view.  Some of the cookies came out sharper in image then others.  Those are the ones I really leaned into while making.

Once cooked, they come out very rich and almost cake like.  Yummy!  You can freeze the cooked cookies.  Unless the cookies are straight from the oven they will be thick and biscotti like.  They are excellent dunked in milk, coffee or schnapps.

Castle Pastry Walls

Castle Pastry Walls

Pastry from the period manuals is with out modern measurements so a bit of guess work is involved.  Making a good pastry is not as easy at it sounds.  The pastry has to be tasty, yet able to hold the interior ingredients if being used as a shell or in this case be able to stand up to being stood up.  Working from 3 books, Pleyn Delit and The English Housewife and The Medieval Kitchen, I redacted a fairly good recipe for pastry castle walls that borrowed this or that from the suggested recipes in each book.

The first recipe is from Pleyn Delite.  Here the original description for castle walls in a subtlety is “Take and make a foyle of gode past with a rollere of a foot brode & lynger by cumpas.  Make iiii coffins of the self past upon the rollere the gretnesse of the smale of thyn arme of vi ynche dep; make the gretust in the myddell.  Fasten the foile in the mouth upwarde, & fasten the otheree foure in every side.  Kerve out keyntlich kyrnels above, in the manere of bateilllyng and drye hem harde in an oven other in the sunne… FC 197”

Hieatte , 140. (Hieatt, 140)

Translation goes “Take and make a dough with a roller a foot wide and long.  Make coffins (lengths?) the width of the small of your arm and an inch deep.  Make the greatest one in the middle.  Fasten the dough on the end upward and fasten the other four on every side.  Curve out the dough in the manner of the batteling and dry them hard in an oven or in the sun…

The original recipe that was offered in Pleyn Delite is more of a how to fashion the castle, only detailing the manner in which to make the castle…the actual dough seems to be up to the cook.  Pleyn Delite does offer a recipe that seems to be from the writers’ point of view not from any actual attached recipe in the book.

The second recipe is from The English Housewife.  The recipe starts as:

Of the mixture of pastes, to speak then of the mixture and kneading of pastes, you shall understand that …your fine white crust must be kneaded with as much butter as water, and the paste made reasonable lithe and gentle, into which you must put three or four eggs or more according to the quantity you blend together, for they will give it sufficient stiffening. (Markham, pp. 96)

The third recipe for dough is from The Medieval Kitchen.  The recipe is not original but a translation.  Cut the fat into the flour.  Dissolve the salt in 1 cup of the water, then add the flour mixture along with the egg.  Work with your fingers until a smooth dough forms, adding more water as required.  Shape into a thick disk, wrap in waxed paper or plastic wrap, and refrigerate for 12 hours or overnight before using.  A larger paite will require you to double the recipe. (Redon, pp. 225)

I did not agree with the cheese suggestion by the Pleyn Delite as I have yet to find a period recipe where cheese was added to a crust that may or may not be eaten.  I did like the base recipe from The English Housewife, but the dough was rather bland with only butter, egg and water to the flour.  After a bit of researching, I found that The Medieval Kitchen used lard with butter which makes for a tastier crust.  There are pros and cons for making a tasty crust as some recipes assumed that the crust would not be eaten and some assumed the crust would be.  I wanted a crust that would bake well, stand up as walls and deliver a very good taste to accompany the cheese “glue” and the candied fruits.

Ingredients:

2 C. Flour        ¼ C lard           3 Tbs butter

1 egg    1 pinch salt       2 Tbs water

My Redaction:

The recipe I did work ended up being a bit of The English Housewife and part from The Medieval Kitchen. The measurements I used will make one wall and a quarter at ¼ inch thick.  The dough is sturdy, easy to mix and very tasty, all the qualities I am looking for when researching the multitude of recipes suggested.

This makes 1 and 1/5 wall of good flavor and stoutness.

I did have to do a little experimenting first.  I tried butter and lard for one batch of pastry

and a combination of butter and duck fat for another pastry combination.

My conclusion by the end of forming the pastry balls, was that while the duck/butter combination was actually better tasting, this dough formation could not hold a form with out flaking and breaking apart as I rolled out the dough.  The butter and lard combination was the combination I went with for the walls.

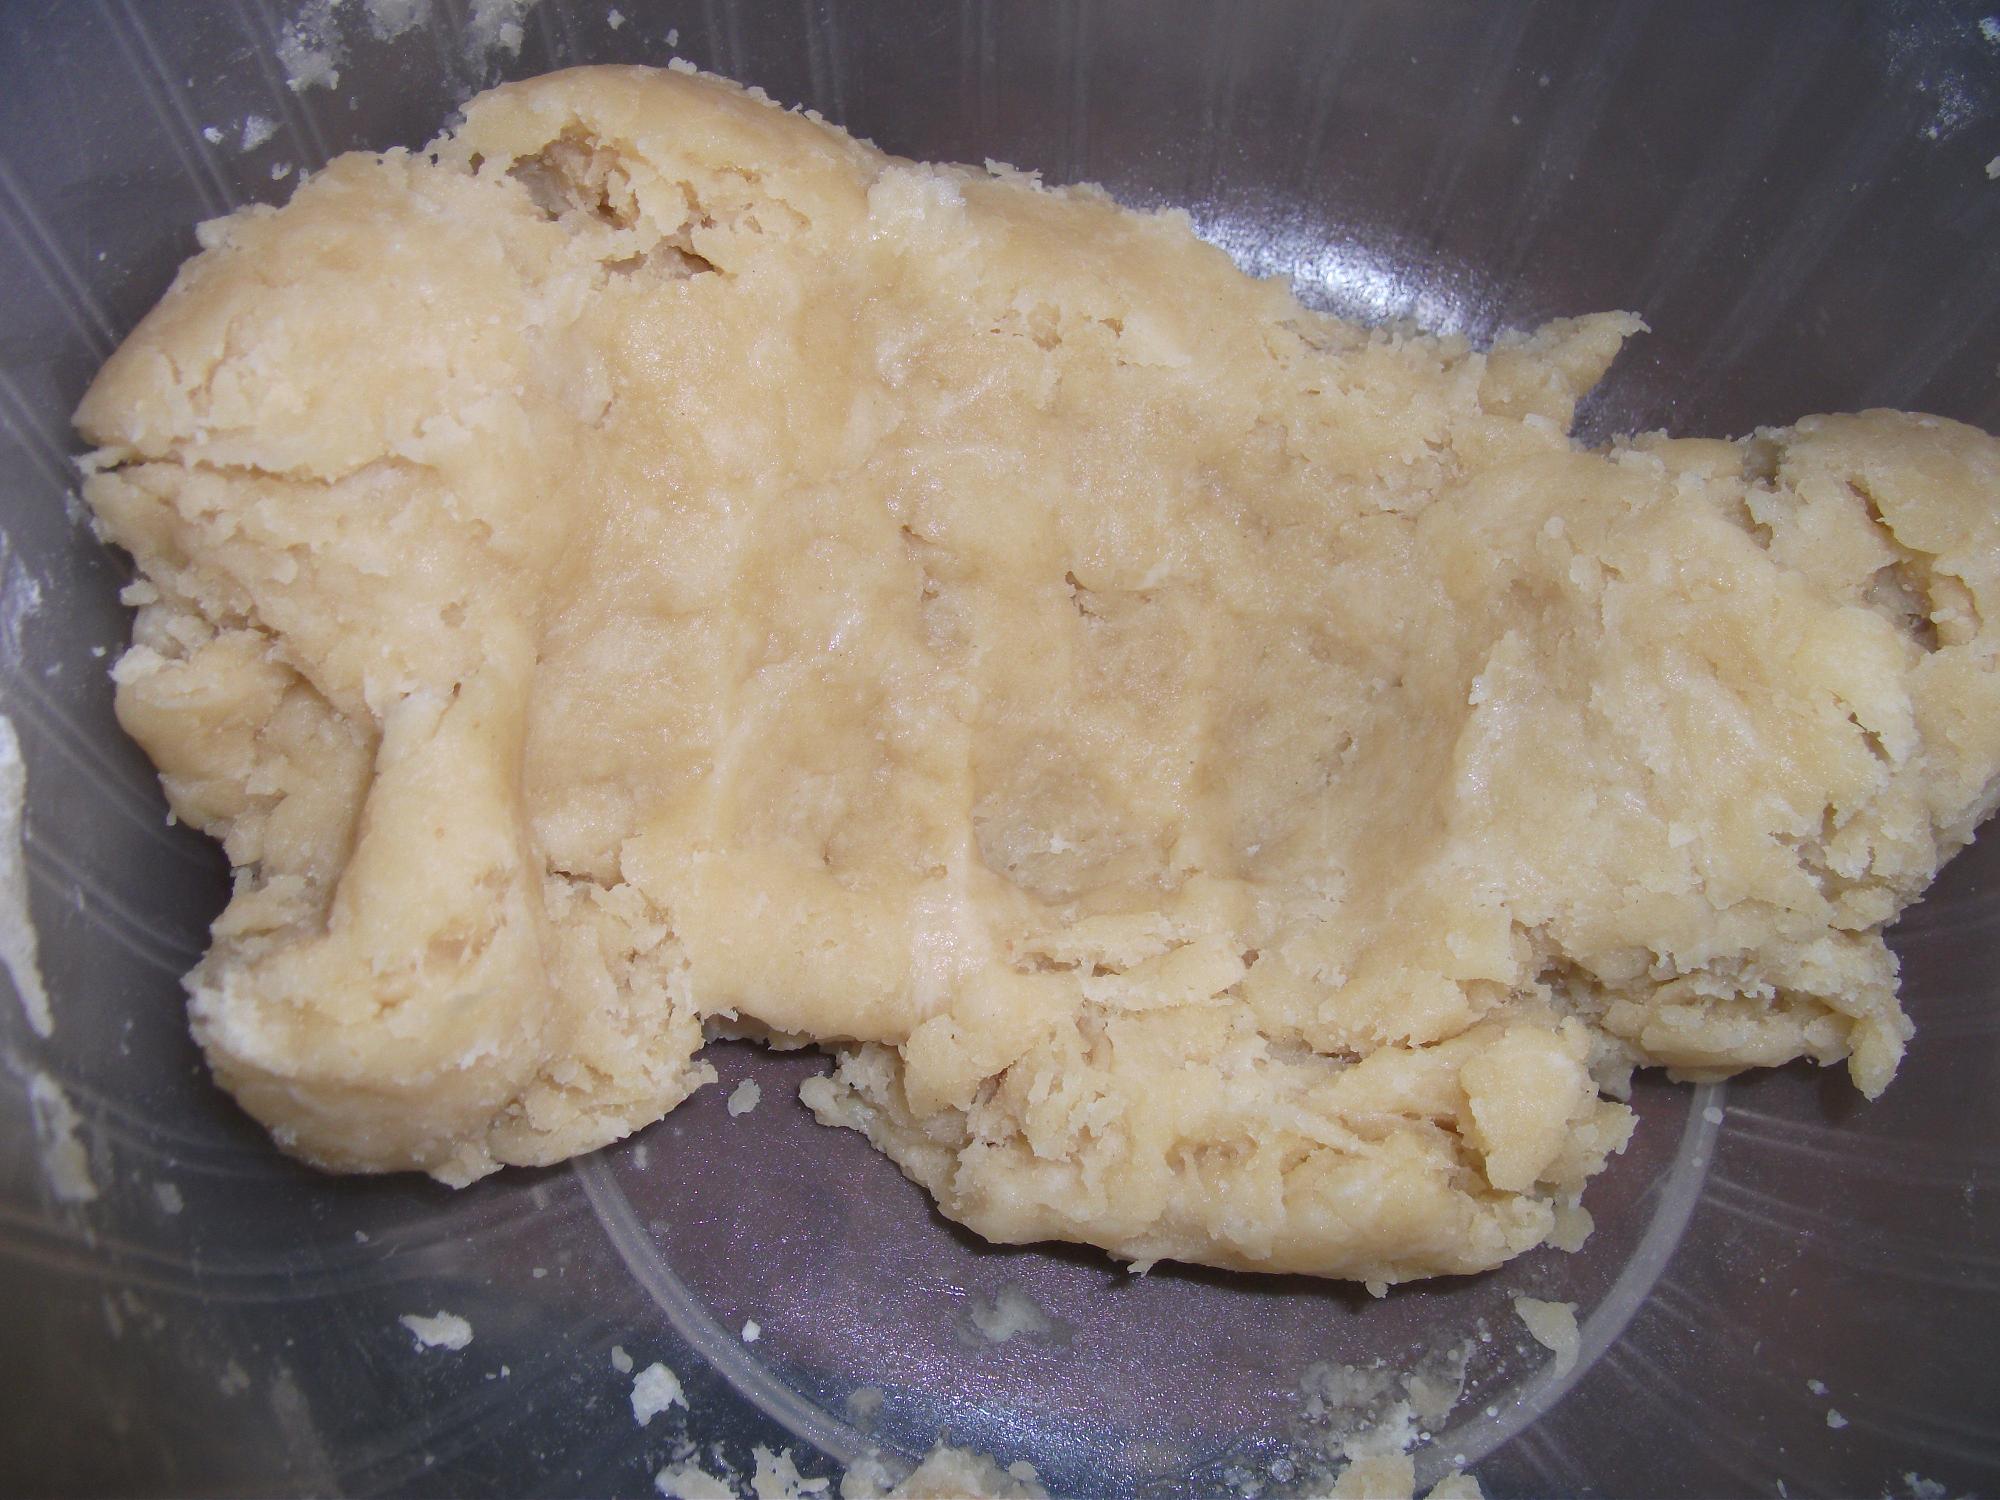
I combined the flour and salt together and formed a well in the center.

The butter and lard was melted together.  The lard used was from rendered pig fat, giving a slight pork flavor to the pastry.  I allowed these to cool to slightly warmer then room temperature then added in the well in the middle of the flour.

I then added an egg and 2 Tbs of water.  Everything is mixed until dough is formed.

On a lightly floured surface, I turn out the dough and roll it to about ¼ inch thick.

Now the original recipe says to 1 inch thick, however I am not making the castle as tall as a foot high so the walls do not need to be quite so thick.  The dough is cut into a large rectangle where a paper castle wall cut out is used to form the battlements.

Using a paper pattern I cut out squares in the upper portion of the battlements along walls.

This is the start of the wall cut out form.

At this point the form was placed on the rectangular shaped dough.

Now for the cutting!

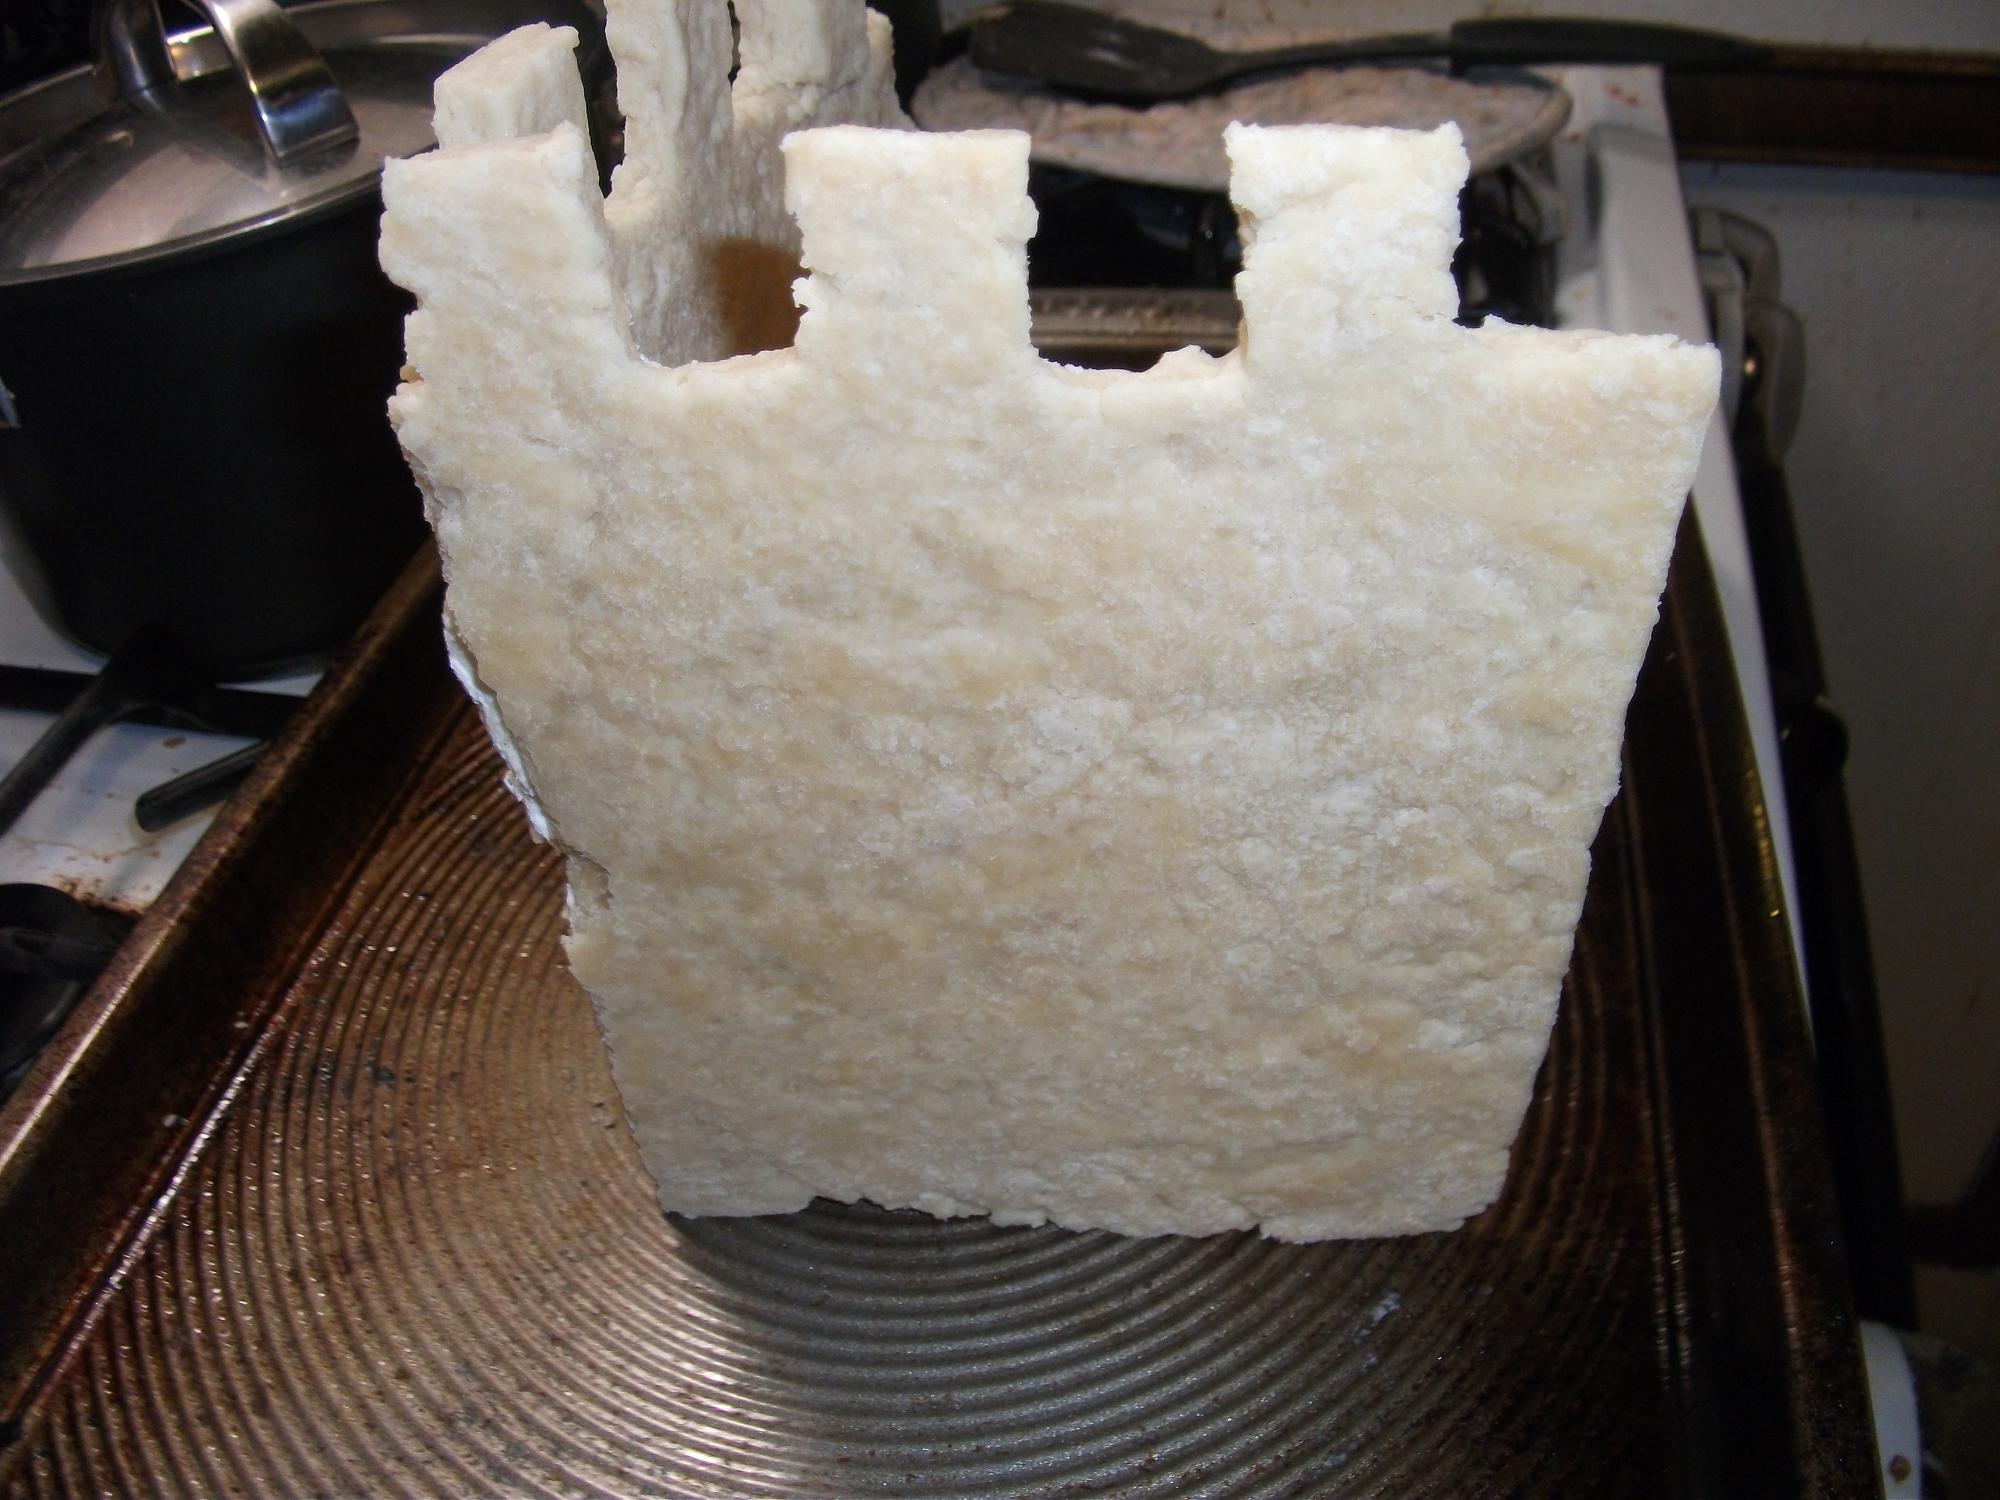
The bastion walls also have battlements cut along the upper portion, however instead of being baked flat these round portions of the castle are wrapped around a greased form and baked upright after the battlements have been cut into the wall.

For this I used a piece of paper, string and foil.

Now for the foil.

And to make sure that the form can stand on it’s own.

The pastry is baked for about 15 minutes at 325, until dry but not brown.

The walls are connected to the bastions with brie cheese.

The inside of a corner.

This is where more cheese would be added to attached the cylinder of dough.

Any soft cheese will work and compliment the flavor of the slightly salty and slightly pork flavored pastry.

Sorry folks the full castle picture will be posted at a later date!  Enjoy these steps for more subtlety information will be incoming!

Rendering of Fat into Lard

Rendering Fat into Lard

Lard is the rendering of animal fat into a solid(ish) state to be used in cooking or as a base for an herbal rub such as a bruise balm.  Rendering fat into lard isn’t hard, just time consuming.

The first step is to pick the type of fat to be used.  The fat from the back or the sides of an animal are usually considered better then the fat from around the organs.  (This is not including caul fat which has different cooking properties).  The fat from the organs, I am unclear as to why, seems to be more odiferous then the melting fat from either the back or the side.  I have heard that leaf lard is the way to go (as being the fat from the back) or that you should never use leaf lard (being the fat from the organs). So the naming of the fat differs depending on where you live, hence the reference as back, side or organ fat.  The exception to this is the ball of fat found on some sheep referred to as tail fat.  The rendering method is the same, just the location is different. Note: Do not use the fat found in the organ region but the fat around the organs (caul fat) is very good.

The type of lard you want is the next step.  Pork, beef, sheep, chicken or even duck can be made into lard or just fat for chicken or duck fat.  Why the fowl get fat instead of lard for theirs I don’t know…it just is.  All have very different tastes.  Each animal imbibes the fat with a flavor.  Some flavors are stronger then other.  Tail fat for instance tastes strongly of mutton while duck tends to have a smoother flavor that is not very strong, more like a hint of duck.

Once the type of fat for rendering has been decided upon, place the fat

into a pan and cover with either a lid or foil and cook until the meat parts turn brown.  2.5 lbs take about 2.5-3 hours.  Once the meat pieces in the fat start to turn brown take the pan from the oven and allow to cool a bit.  Ladle into molds.

I used muffin molds which measure ¼ cup per muffin round.  Once the liquid has been put into molds, put the mold pan into the freezer.

This makes the lard easier to remove from the pan and the individual lard cakes can be stored in plastic bags in the freezer for up to 3 months.

The crispy pieces left over, are called crackling and can be used for other dishes.

Save these!  Very period…but also makes an excellent addition in cornbread.

Upon occasion the timing is off when cooking fat and overcooking will occur.  This can be quickly spotted when the rendered fat is an amber color instead of clear gold.

If the cracklin part is burnt, toss the fat and cracklin away.  The liquid fat, in a prior picture is actually amber and from the burnt batch and was thrown away.  The fat needs to be clear and golden in color.  Burnt fat transfer the taste of burnt ash to the fat.  There is nothing to be done at this point.

English Books

So these are the English cookbooks I have.  These are only a few of a good period English cooking library.   These are definitly good for thumbing through for both ideas and for recipes/ingredients/how to in period.

The English Housewife. This book is very good for a look into a period household for common every day pieces of information on cooking, gathering, planting ect.  The recipes are with out measurement, so lots of experimentation is to be done.

Take a Thousand Eggs or More. I adore this 2 pack set of books.  Great original recipes in old English.  There is the author’s translation and recipe measurements, which you can either follow or experiment with.  Great for any level of cook.

The Medieval Kitchen. I like this one…the old English is translated in to modern so there is probably a slight drift (but not to much) from the original wording. There are measurements for these recipes to either copy directly from when cooking or take as…guidelines.  Another great book for any level cook.

Pleyn Delit: Medieval Cookery for Modern Cooks. I like this cookbook.  It’s not nearly as polished as say Take a Thousand eggs but the recipes are still very good as well as a bit of extra on history and Subtleties.  There are measurements so that any one can follow as well as the original recipe and a translation.  A good cookbook.

English Royal Cookbook. This one is not one of my favorites though it does provide dates for recipes and measurements.  There is not an original recipe just the writer’s words.  The historic part is interesting.  This is an ok book, worth having in the library but it will not be as well thumbed as others.

Fabulous Feasts. This book has really fun information and great pictures.  The references at the end of the book are incredible!  The recipes in this book do not list an original recipe.  This a great secondary source but not good for a primary source.

The Gourmet’s Guide 1580-1660. This is a small pamphlet, with a little history and a lot of recipes.  Each recipe has an original recipe, ingredients then the author’s redaction.  Not a bad little pamphlet.  Good references.  Definitely something to keep an eye out for and to acquire.

Orengat

Candied Orange Peel

Translation:

Cut the peel of an orange into five pieces and scrape away the skin inside with a knife; then set them to soak in pure fresh water for nine days, and change the water every day.  Then boil them in pure water, but only until they come to a boil, and when this is done spread them on a cloth and let them dry out well.  Then put them in a pot with enough honey to cover them and boil over a slow fire, skimming.  And when you think that the honey is cooked …then take out your orange peels and ragne them in a layer, and sprinkle powder of ginger over, then another layer, and sprinkle, etc., until finished; and leave a month or more before eating.

(Hieatt, pp. 133)

Ingredients:

6 thin skinned oranges

2 cups honey

Powdered ginger

Redaction:

I had to do a few variations.  The first is that I had no Seville oranges, so I used think skinned Texas navels.

The sections were cut into 6 sections instead of 5; however seeing that the navels were fairly large I was pretty sure the extra section could be over looked.  The orange peels of a Seville orange are reputed to be bitter, hence the soaking and draining, besides making the peels more flexible.

So instead of soaking for 9 days, I soaked the peels for 24 hours.

I skipped the step where the skins were to be blanched.  What could have happened if Seville oranges peels were used, would be that I would have put the peels into boiling water for about 30 seconds, enough to soften them up even further.  The navel peels were pretty flexible and soft after 24 hours so the thought of making them more sore worried me a bit.

Next I put the skins into honey, enough to cover and boiled till the peels were saturated and limp, roughly 15 minutes in the boiling honey bath.

Enough honey to cover.

This is the honey boiling with the oranges peels immersed.  At this portion, care is needed so that the honey does not boil over the sides of the pot.

The peels were then placed on parchment paper and sprinkled with ginger.

I placed any where from 5-6 peels per parchment sheet.  I did add a little sugar to the finished ginger dusted peels as I wanted a crystalline look to the peels.

There are about 5 layers of orange peels.  A clay pot that I was not using for anything specific was transformed into the storage container for them before I break them out for a different sort of tasty treat.

The original recipe does not specify what type of container or that the peels were separated between layers.  They layers may have been stacked one on top of each other so that each side benefited from the ginger dusting or the writer of the recipe figured that layering was so matter of fact that the information did not need to be added into the written recipe.  My suggestion would be to try both ways and see which one you prefer for your next candied orange peel experiment!